The best RV solar kit for most people is a 200-watt starter kit with an MPPT charge controller, like the Renogy 200W kit, for around $300. Weekend campers can start with a 100-watt kit, full-timers should step up to 400 watts or more with a lithium battery, and anyone who does not want to drill the roof can use a portable solar suitcase or an all-in-one power station instead.
RV solar keeps your batteries charged from the sun, so you can camp away from hookups without running a generator. It is the single upgrade that unlocks quiet, self-sufficient boondocking.
How much you need depends on how you camp, and setting it up is a weekend job most owners can do themselves. Below are the best kits by type of RVer, the parts explained, how to size a system, and how to install it.
| Best for | Our pick | Price |
|---|---|---|
| Most RVers (best overall) | Renogy 200W MPPT starter kit | $250 to $330 |
| Budget and first-timers | Renogy 100W starter kit | $110 to $150 |
| Full-timers and heavy off-grid | Renogy 400W premium MPPT kit | $450 to $650 |
| No drilling (portable) | Renogy 200W solar suitcase | $300 to $420 |
| No wiring (all-in-one) | EcoFlow Delta 2 power station | $500 to $900 |
How RV solar works
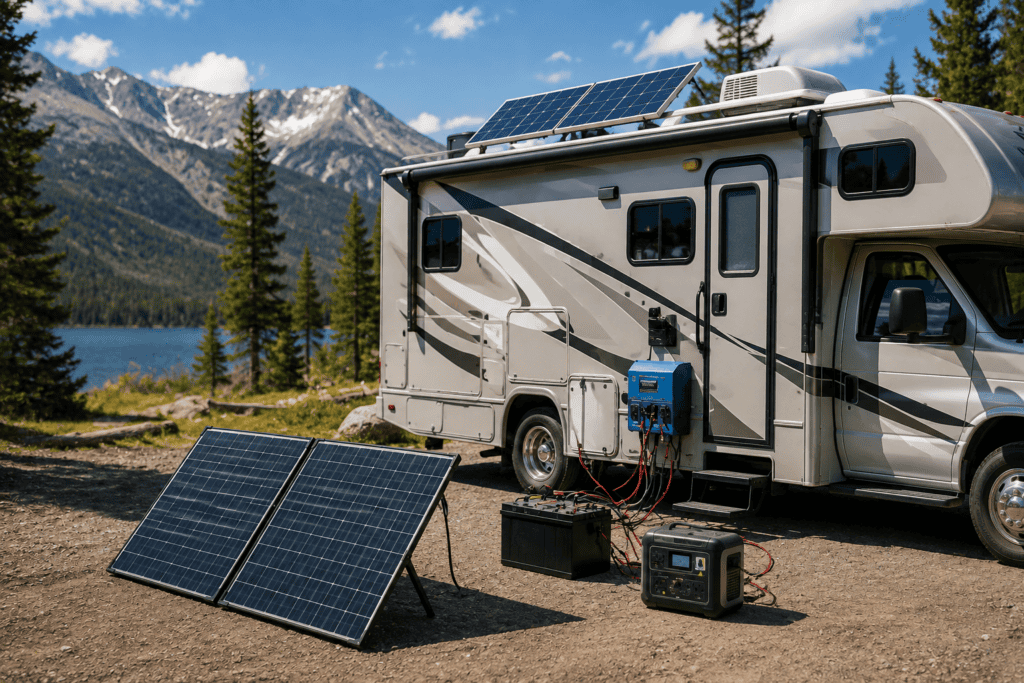
An RV solar system has four parts that pass power down a chain: from the sun to your devices. Understanding them makes buying and installing far less intimidating.
Solar panels: mounted on the roof or set out portably, they turn sunlight into DC power. Panel size is measured in watts, and more watts means more charging.
Charge controller: the brain between the panels and the battery. It regulates the voltage so the panels charge the battery safely instead of overcharging it. This is where MPPT or PWM matters (more below).
Battery: stores the power for when the sun is down. Most kits do not include a battery, so you supply one, and lithium (LiFePO4) is the upgrade worth making for serious use.
Inverter: optional. It converts the battery’s DC power to the AC that household plugs and appliances use. You only need one if you want to run AC devices like a laptop charger or a coffee maker.
MPPT vs PWM: which charge controller do you need?
Charge controllers come in two kinds, and the difference is real money in charging speed. It is the one spec worth getting right.
An MPPT controller is more efficient, often getting 20 to 30 percent more power out of the same panels, especially in cold or cloudy conditions. It costs more, and it is worth it for any system of 200 watts or more.
A PWM controller is cheaper and simpler, and it is perfectly fine for a small single-panel 100-watt setup. Beyond that, spend the extra for MPPT: you will get noticeably more charging from the same roof space.
How much solar do you need?
The right size depends entirely on how you camp. A weekender topping off batteries needs far less than a full-timer running a fridge and an inverter.
As a rough guide, 100 watts of panel makes about 300 to 350 watt-hours on a good sunny day. Match that to your daily use with the table below, then round up, because you will always want a little more than you think.
| How you camp | Recommended solar | Battery |
|---|---|---|
| Weekends: lights, fans, charging phones | 100 to 200 watts | Stock or one battery |
| Regular trips and some boondocking | 200 to 400 watts | Lithium recommended |
| Full-time or off-grid with an inverter | 400 watts and up | Lithium bank plus inverter |
The best RV solar kits
Here are our picks by the kind of RVer you are, from a first 100-watt kit to a full off-grid system. Start with the one that matches how you camp.
Best overall for most RVers: Renogy 200W MPPT starter kit
For most RVers, the Renogy 200-watt starter kit with an MPPT controller is the right first system. Two 100-watt panels and an efficient MPPT controller keep a weekend of lights, fans, a water pump, and device charging topped up, with headroom to spare.
It comes complete with mounting brackets, cables, and adapters, so you have everything but the battery. It is also expandable, so you can add panels later as your needs grow.
Pros
- Enough power for most weekends and light boondocking
- Efficient MPPT controller included
- Complete kit with brackets and cables
- Expandable as your needs grow
Cons
- Battery not included
- Roof mounting takes an afternoon
- May be light for heavy full-time use
Renogy 200W 12V MPPT starter kit
Two 100-watt panels and an efficient MPPT controller, complete with mounting hardware. The sweet spot of power, price, and room to grow.
Check price ›Best budget and first-timer kit: Renogy 100W starter kit
If you camp a few times a year and just want to keep the batteries topped and the lights on, the Renogy 100-watt kit is a cheap, easy way in. It is enough to run LED lights, charge phones, and run the fans and water pump for a weekend.
It uses a simpler PWM controller, which is fine at this size, and it includes the brackets and cables to get started. You can always add a second panel later.
Renogy 100W 12V starter kit
The easy, affordable entry to RV solar: enough to keep batteries topped and lights on for a weekend, with everything you need to install it.
Check price ›Best for full-timers and heavy off-grid: Renogy 400W premium kit
If you live in your rig or boondock for days at a time, plan on 400 watts or more. The Renogy 400-watt premium kit pairs four panels with a 40-amp MPPT controller and a Bluetooth module so you can monitor charging from your phone.
With a lithium battery and an inverter, this is enough to run a 12-volt fridge, charge laptops, and keep the lights and pump going through cloudy days. It is the system serious off-gridders build around.
Renogy 400W 12V premium MPPT kit
Four panels, a 40-amp MPPT controller, and Bluetooth monitoring for serious off-grid use. The base of a real full-time power system.
Check price ›Best portable, no drilling: Renogy 200W solar suitcase
If you rent, or you do not want to drill holes in your roof, a folding solar suitcase gives you real power with zero permanent install. You unfold it, point it at the sun, and clip it to your battery.
The big advantage is that you can park the rig in the shade and set the panels in the sun, which rooftop panels cannot do. It folds up with a handle and stores in a bay when you are done.
Renogy 200W solar suitcase
Folding panels with a built-in controller and kickstand: park in the shade, put the panels in the sun, and clip to your battery. No drilling.
Check price ›Best all-in-one, no wiring: EcoFlow Delta 2 power station
If wiring a system sounds like too much, an all-in-one power station is the simplest solar there is. The EcoFlow Delta 2 combines a lithium battery, an inverter, and a charge controller in one box, so you just plug a solar panel into it and plug your devices into the outlets.
It charges from the wall, your vehicle, or a solar panel, and it runs AC devices right out of the box. It is the easiest path to solar for renters and anyone who wants no permanent install at all.
EcoFlow Delta 2 portable power station
Battery, inverter, and controller in one box: plug in a solar panel and plug in your devices. The simplest solar for renters and beginners.
Check price ›How to set up RV solar, step by step
Installing a rooftop kit is a weekend job with basic tools. Work in this order, because the wiring sequence matters for safety.
- Plan the layout Lay the panels on the roof to plan placement and wire runs before you mount anything. Keep panels clear of vents, antennas, and the air conditioner shadow, and pick a spot for the controller near the batteries.
- Mount the panels Attach the Z-brackets to the panels, set them on the roof, screw them down, and seal every screw and bracket edge with a self-leveling lap sealant. A watertight roof is as important as the wiring.
- Run the wires inside Bring the panel cables down through a weatherproof entry gland mounted on the roof, sealed well, and route them to where the controller will live.
- Mount and wire the controller Fix the charge controller on a wall near the batteries. Connect the battery to the controller first, then the panels to the controller. Doing it in that order lets the controller detect the battery voltage correctly.
- Fuse the connections Put an inline fuse on the wire between the controller and the battery, sized to your system. This protects the wiring and is not optional.
- Add an inverter if you need AC If you want to run household plugs, wire an inverter to the battery bank. Size it to the largest AC load you plan to run.
- Test it Cover or angle the panels, make the final connections, then expose the panels to sun and confirm the controller shows the battery charging. Check every connection is snug.
How to choose an RV solar kit
Three questions point you to the right kit. Run through them and the choice usually makes itself.
- How you camp Weekends near hookups need little; days of boondocking need a lot. Match the wattage to the sizing table above, then round up.
- Whether you will drill the roof Owners staying long-term should mount panels on the roof for always-on charging. Renters and the drill-shy should use a suitcase or a power station.
- How much you want to wire A rooftop kit means a day of installing. An all-in-one power station means none, at a higher price per watt. Pick your trade-off.
The bottom line
Match the system to how you camp. Most RVers should start with a 200-watt rooftop kit and an MPPT controller, the best balance of power and price, and add panels later if they need more.
Weekenders can begin with 100 watts, full-timers should plan on 400 watts or more with a lithium battery, and anyone who does not want to drill or wire can get there with a portable suitcase or an EcoFlow power station. Whatever you buy, size it for a little more than you think you need, and wire the battery before the panels.
Kitting out the rest of your rig? See our RV gear guides, including the best RV leveling blocks and best RV water filter.