Winterizing an RV means draining all the water from its plumbing and protecting what you cannot drain with non-toxic RV antifreeze, so nothing freezes, expands, and cracks a pipe while the rig sits through winter. It is about an hour of work that prevents a repair bill in the hundreds or thousands, and this guide covers every step, the right way, the first time.
The idea is simple: get every drop of water out of the plumbing, then protect whatever you cannot fully drain. There are two accepted ways to do it, and we cover both, but the goal is always the same. Do this before the first hard freeze and your rig comes out of storage in spring exactly as you put it away. Skip it, and freezing water can split a pipe you cannot even see until it leaks.
When should you winterize your RV?
The trigger is temperature, not the calendar. Water begins to freeze at 32 degrees Fahrenheit (0 Celsius), and once your overnight lows sit at or below freezing for a sustained stretch, the water in your lines is at risk. A single light frost usually will not burst a pipe, but a hard freeze, or several freezing nights in a row, can. The safe rule: winterize before the first hard freeze in your area, or before you park the rig for the season, whichever comes first. If you are unsure, winterize anyway. There is no downside to doing it early, and every downside to doing it a week too late.
Two ways to winterize: antifreeze or compressed air
Both methods aim to leave no water where it can freeze. They just get there differently, and each has a place.
The antifreeze method pumps non-toxic RV antifreeze through the plumbing so that even a trace of leftover water is diluted below its freezing point. The compressed-air method (also called blowing out the lines) uses an air compressor to push all the water out of the pipes, so there is nothing left to freeze at all, and then uses a small amount of antifreeze only in the drain traps and holding tanks.
Antifreeze method
- Most reliable in hard, extended cold
- Simple, forgiving, hard to get wrong
- No compressor needed
- Fills traps and tanks in the same pass
Compressed-air method
- Faster and cheaper year to year
- Easiest to de-winterize in spring
- No antifreeze taste to flush out
- Needs a compressor and careful, thorough work
What you will need
Everything here is inexpensive and, apart from the antifreeze, reusable every year. Buy the bypass kit and blowout plug once and you are set for the life of the rig.
- Non-toxic RV antifreeze: plan on 2 to 3 gallons for the pump method, or 4 or more gallons if you pour it into the fresh tank. Buy an extra jug so you never run short mid-job.
- A water heater bypass kit: most RVs built in the last decade already have one installed. If yours does not, a bypass kit is cheap and worth adding.
- A water pump converter kit (siphon hose): lets your onboard pump draw antifreeze straight from the jug. Many bypass setups include this.
- A blowout plug: only if you are using the air method. It screws into the city water inlet so you can connect a compressor.
- Basic hand tools: a socket or wrench for the water heater plug, and a screwdriver for access panels.
Non-toxic RV antifreeze (pink, propylene glycol)
The only antifreeze that belongs in your rig. Buy two or three jugs so you never run dry mid-job.
Check price ›How to winterize your RV plumbing, step by step
This is the core of the job: the antifreeze method, start to finish. Work through it in order, because a few steps depend on the ones before them (draining before bypassing, bypassing before adding antifreeze). Give yourself about an hour the first time.
- Turn off and cool the water heater Switch the water heater off in both gas and electric modes, and let it cool completely. Draining a hot, pressurized tank can scald you. Never run the water heater while it is empty, so leave it off for the whole job.
- Turn off the water pump and disconnect city water Make sure the pump is off and you are not connected to a campground water hookup. Open a faucet briefly to release any pressure in the system.
- Drain the fresh, gray, and black tanks Empty the black tank first, then the gray, at an approved dump station, and rinse if you can. Open the fresh water tank drain and let it run dry. Starting the winter with empty tanks prevents freeze damage and odor.
- Drain the water heater With the heater cool and off, remove the drain plug (or anode rod, see the note below) and open the pressure relief valve so it drains fully. This tank alone holds 6 to 10 gallons of water you do not want freezing inside it.
- Open the low-point drains and every faucet Find the low-point drain lines (usually two colored caps under the rig, hot and cold) and open them. Open every faucet, hot and cold, plus the shower and the outside shower, and let gravity pull the lines empty. Then close the low-point drains and faucets again.
- Remove or bypass the inline water filter If you have a canister water filter, take the cartridge out and bypass the housing (or just leave it empty). Antifreeze will ruin a filter cartridge, and it should never be forced through one.
- Set the water heater to bypass Turn the bypass valves behind the water heater to the bypass position. This is the step people forget, and it matters: without it, you will pump several gallons of antifreeze straight into the water heater tank, waste most of your supply, and have a mess to flush in spring. Bypassing routes the antifreeze around the heater instead.
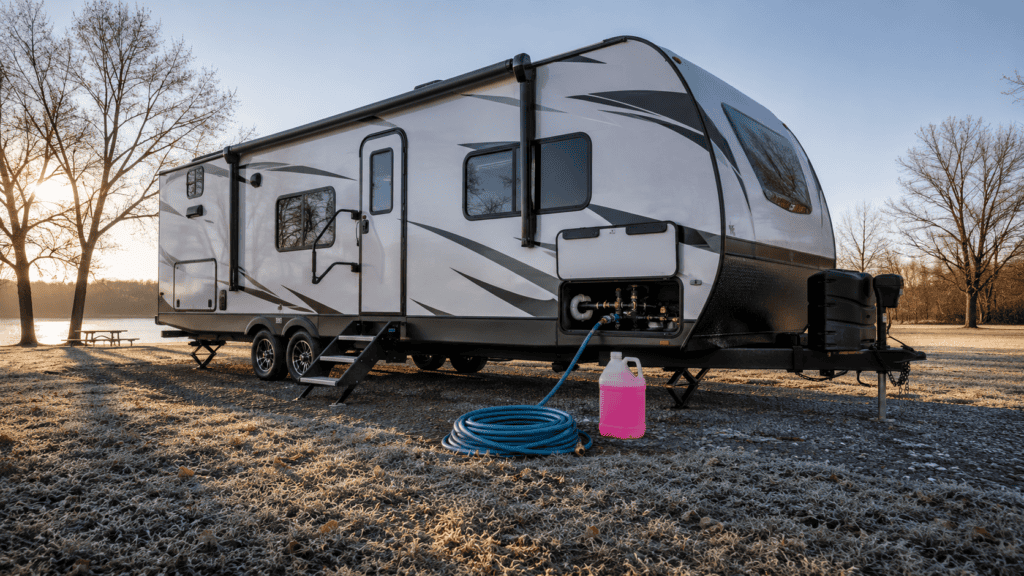
- Connect the pump to the antifreeze Attach the siphon hose to the water pump inlet (the converter kit makes this a twist of a valve) and drop the other end into a jug of RV antifreeze. This lets the pump draw pink straight from the bottle. If you do not have a converter kit, pour at least 4 gallons of antifreeze into the drained fresh tank instead.
- Pump antifreeze through every line Turn the pump on. Starting with the faucet closest to the pump, open the cold side until the water runs pink, then the hot side until it runs pink, and close it. Work your way to the farthest fixture, doing every one: kitchen, bathroom, shower, outside shower, and any washer or dishwasher hookups. Keep an eye on the jug and swap in a fresh one before it runs empty so you do not pump air.
- Do the toilet and refrigerator line Flush the toilet until pink antifreeze fills the bowl and a little runs into the black tank, and leave some in the bowl to protect the seal. Do not pump antifreeze into an icemaker or refrigerator water line, just make sure it was drained earlier.
- Pour antifreeze into every drain and trap Pour about a cup or two of antifreeze down each sink and shower drain to fill the P-traps (the U-shaped bends that hold water), and a cup into the toilet after flushing. This protects the traps and puts a little antifreeze into the holding tanks.
- Close everything up Turn off the pump, reinstall any drain plugs you removed, and close all the faucets. Closing the system also keeps insects and rodents from finding their way into the plumbing over winter.
The air blowout method, if you prefer it
If you would rather push the water out with air, the early steps are the same: turn off and drain the water heater, empty the tanks, remove the water filter, and open the low-point drains and faucets. Then, instead of pumping antifreeze, you blow the lines clear. Here is how to do it without damaging anything.
- Bypass the water heater and close the drains Set the water heater to bypass so you are not forcing air through it, and close the low-point drains and faucets for now.
- Attach the blowout plug and compressor Screw the blowout plug into the city water inlet and connect your air compressor to it. Any compressor with an adjustable regulator works, including an inexpensive pancake compressor; a 12-volt unit like the VIAIR 400P-RV has the bonus of also inflating your RV tires. Set the compressor’s regulator low before you turn it on.
- Keep the pressure at 30 to 40 PSI This is the safety-critical number. Set the regulator to 30 to 40 PSI and never exceed 50 PSI, or you risk splitting a line or blowing a fitting. Your RV plumbing is not meant for shop-compressor pressure.
- Blow out one fixture at a time Open one faucet, hot then cold, and let the air push the water out until only air sputters through, then close it and move to the next. Do every fixture, plus the shower, outside shower, and toilet. Flush the toilet with the air running to clear its line.
- Protect the traps and tanks with antifreeze Air cannot protect the P-traps or the water in the holding tanks, so finish by pouring a cup or two of RV antifreeze down each drain and into the toilet, exactly as in the antifreeze method.
Winterize the rest of the RV, not just the pipes
The plumbing is where freeze damage happens, but a proper winterizing protects the whole rig from the months of cold, damp, and stillness ahead. Spend another twenty minutes on these and you avoid dead batteries, flat-spotted tires, and a spring surprise of mold or mice.
- Care for the battery A battery left connected slowly drains and can freeze when low. Disconnect it, or remove it and store it somewhere cool and dry, and keep it topped up over winter with a maintainer or an occasional charge. A fully charged battery resists freezing far better than a flat one.
- Protect the tires Inflate to the recommended pressure, since tires lose air in the cold, and move the rig or put it on blocks if it will sit for months to avoid flat spots. Tire covers shield them from sun and weather.
- Shut off the propane Close the propane tank valves for storage. If your refrigerator ran on propane, turn it off, empty it, clean it, and prop the doors open so it does not grow mold.
- Seal out pests Mice will find any gap. Remove all food, close off entry points around pipes and wiring, and place deterrents where rodents might enter. An open bag of chips left in a cabinet is an invitation.
- Manage moisture Damp, closed-up RVs grow mildew. Set out moisture absorbers, leave cabinet and closet doors ajar for airflow, and make sure roof vents and seals are intact so no water gets in.
- Inspect and cover the exterior Wash the rig, check the roof and window seals for cracks and reseal if needed, retract and clean the awning, and cover the RV with a breathable cover if it stores outside.
Common winterizing mistakes to avoid
Almost every expensive winter repair traces back to one of these. None of them takes extra time to avoid, just attention.
- Using automotive antifreeze: it is toxic and unsafe for a potable system. Only the pink non-toxic RV kind goes in your rig.
- Forgetting the water heater bypass: skip it and you dump gallons of antifreeze into the tank and waste most of your supply.
- Leaving the water heater drained but powered: running it dry can destroy the heating element. Keep it off all winter.
- Blowing out lines at too high a pressure: over 50 PSI can crack lines and fittings. Keep it at 30 to 40.
- Missing a fixture: the outside shower, a second bathroom, or a washer hookup is easy to forget, and one un-winterized line is all it takes.
- Skipping the P-traps and toilet: water sits in the traps and can freeze and crack them even when the lines are clear.
How much does it cost to winterize an RV?
Doing it yourself is cheap. Plan on roughly $20 to $50 a year, mostly for two or three jugs of antifreeze, since the bypass kit and blowout plug are one-time buys you reuse every season. A dealer or mobile RV service will do it for you, typically for $130 to $250 depending on the rig and your area. Given that the whole job is about an hour of straightforward work, most owners quickly learn to do it themselves, and this guide is all you need to.
When spring comes: de-winterizing
Come spring you reverse the process: flush the antifreeze out of the lines with fresh water, take the water heater out of bypass, sanitize the fresh water system, and reinstall your water filter before you use the rig again. It is quicker than winterizing and just as important to do properly. We cover it step by step in our how to de-winterize your RV guide.
The bottom line
Winterizing comes down to one principle: no water left where it can freeze. Drain the tanks and water heater, clear the lines with antifreeze or air, bypass the water heater before you add antifreeze, protect the traps and toilet, and never use anything but non-toxic RV antifreeze. Add twenty minutes for the battery, tires, propane, and pests, and your rig sleeps safely through the coldest months. It is the cheapest insurance in RVing, and after your first time, it takes about an hour.
Keeping your rig road-ready year round? See our full RV maintenance guides for what to check next.